IndiGo Web Checkin - Step by Step Guide
📋 Before You Start
Requirements: PNR/Booking Reference + Email Address or Last Name
Time Window: 48 hours to 60 minutes before departure
Not Available For: Unaccompanied minors, wheelchair assistance, stretcher passengers
Visit IndiGo Checkin Page
Go to IndiGo Web Checkin or click the "Web Check-in" button from the IndiGo homepage.

👆 How to Find the Web Checkin Button
On the IndiGo homepage, look for the orange "Web Check-in" button in the main navigation area. It's usually positioned prominently near the top of the page alongside other key services like "Book Flight" and "Manage Booking".
Enter Booking Details
Enter your PNR (6-character booking reference) and email address or last name
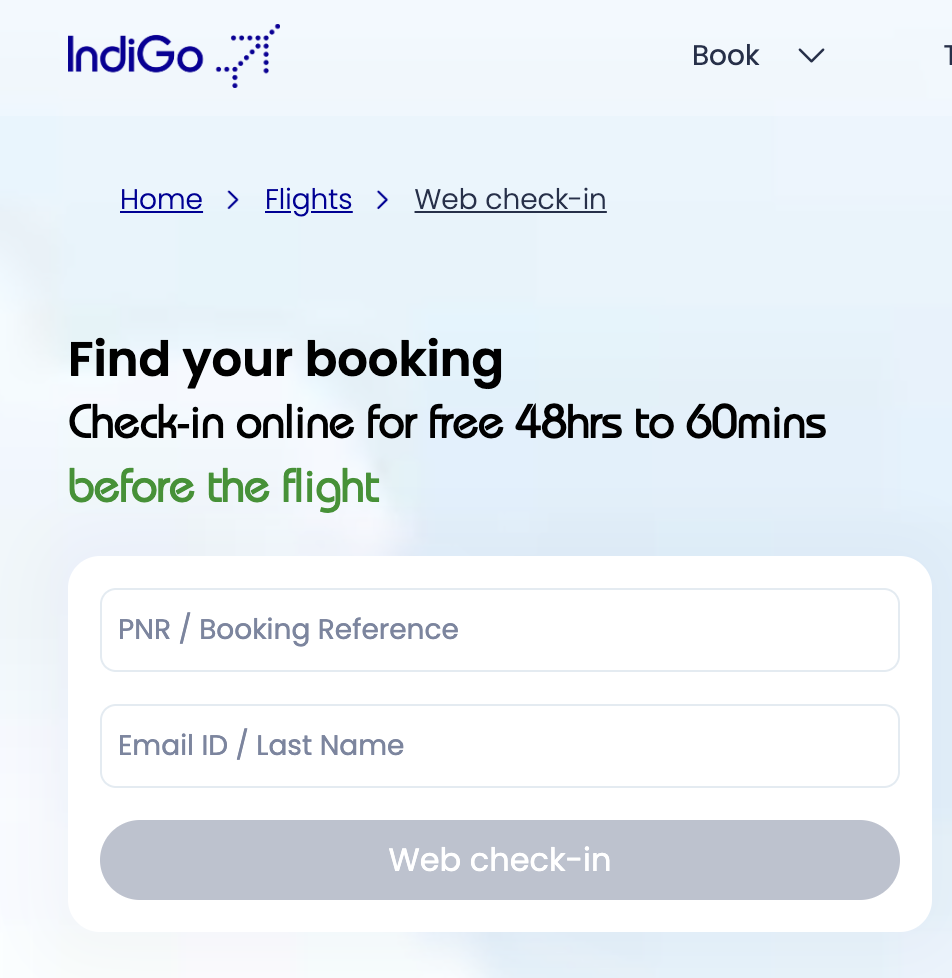
📝 How to Fill the Checkin Form
PNR/Booking Reference: Enter the 6-character alphanumeric code from your booking confirmation (e.g., ABC123)
Email/Last Name: Use the same email address used during booking OR enter the primary passenger's last name exactly as in the booking
Pro Tip: Copy-paste the PNR from your booking email to avoid typos
⚠️ Common Problem: "Booking not found"
Causes: Wrong PNR format, typos in email/name, booking too recent
Solutions: Check booking confirmation email, try both PNR and ticket number, wait 30 minutes if booking just made, ensure email exactly matches booking
Select Passengers
Choose which passengers to check-in (can select individual passengers or all)
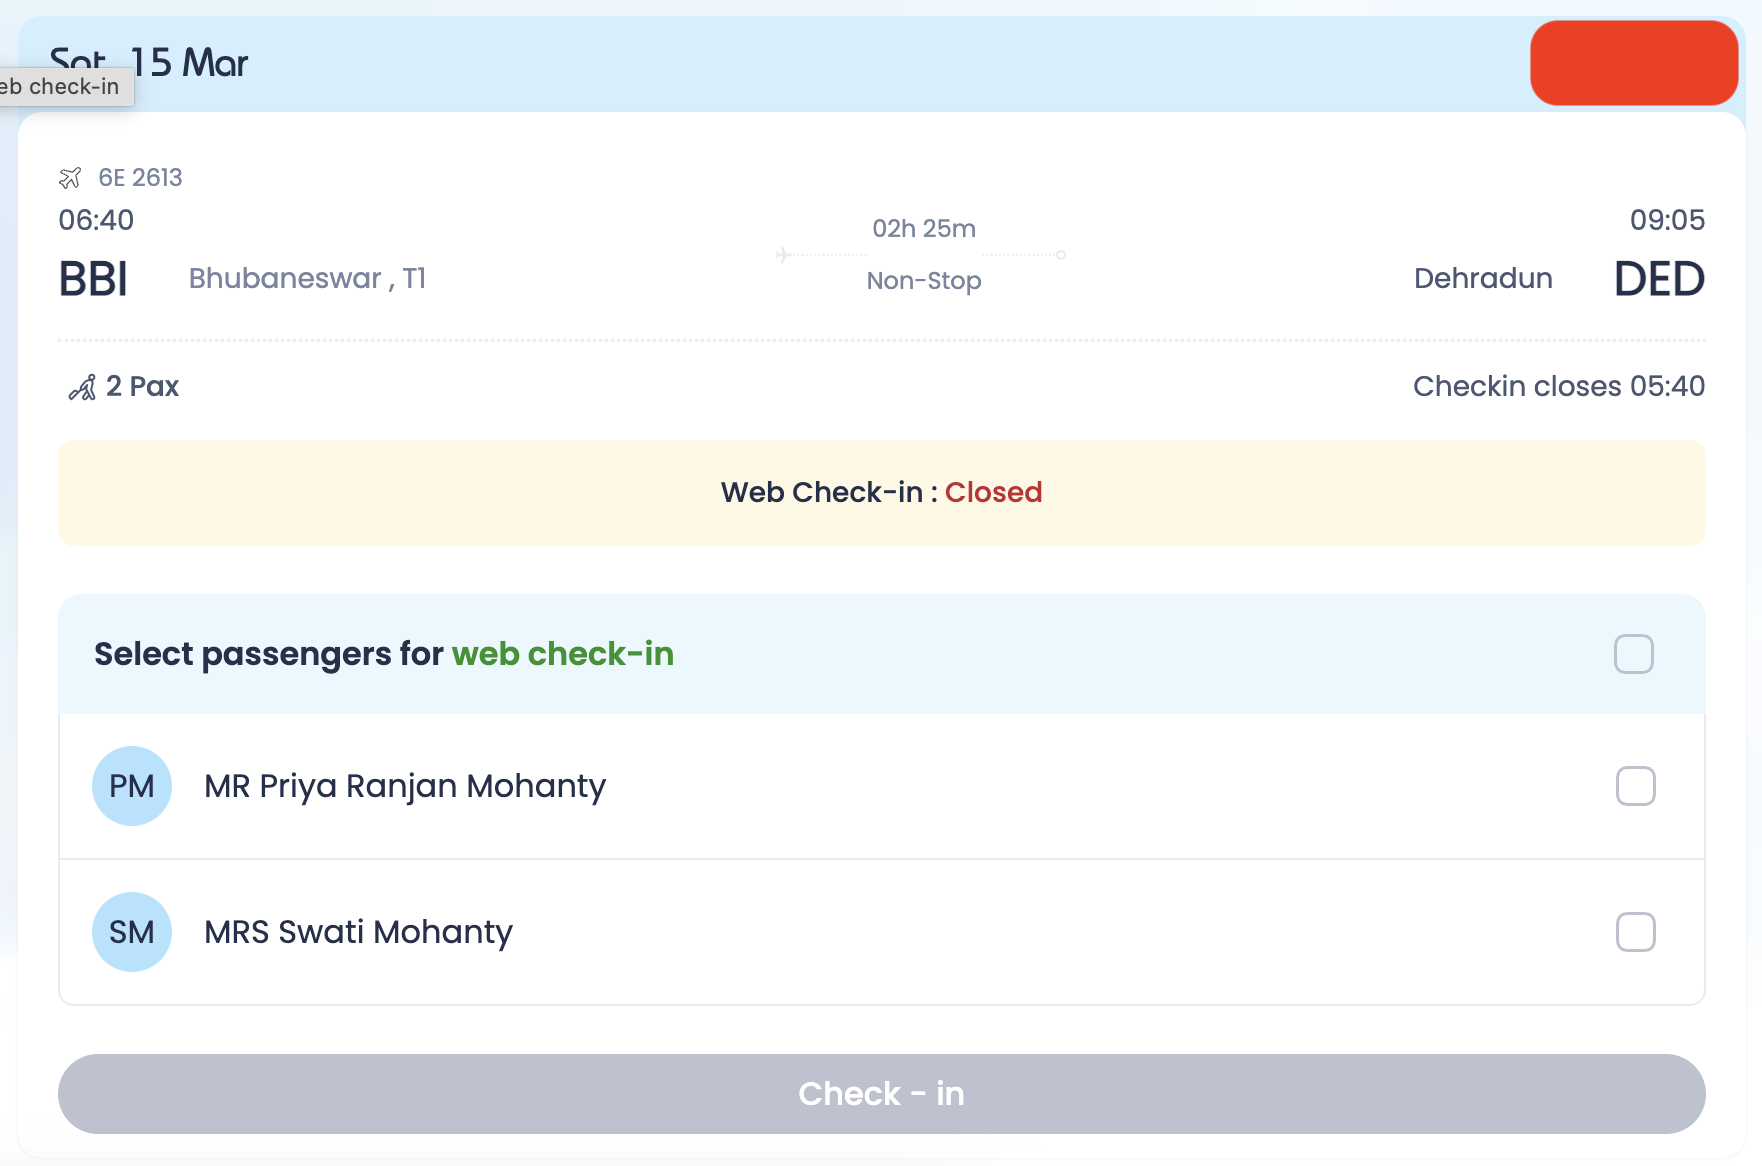
👥 Passenger Selection Options
Individual Selection: Use checkboxes to select specific passengers for checkin
Select All: Use "Select All" option to check-in everyone at once
Partial Checkin: You can check-in some passengers now and others later
Note: Each passenger must meet checkin eligibility (no special assistance required)
Seat Selection (Optional)
Choose your preferred seats. IndiGo charges for most seat selections.
💺 Understanding IndiGo's Seat Map Layout
What You'll See: An aircraft seat map showing your flight's seating arrangement
Color Coding:
• Green seats = Available for free (usually middle seats in back rows)
• Yellow seats = Regular paid seats (₹200-₹600)
• Blue seats = Preferred seats with extra legroom (₹400-₹1,000)
• Purple seats = XL seats with maximum legroom (₹800-₹1,500)
• Red X = Unavailable/occupied seats
💰 IndiGo Seat Selection Strategy
Free Option: Skip seat selection entirely - you'll be assigned seats at airport (usually middle seats)
Budget Choice: Look for green-colored free seats if available
Comfort Choice: Select aisle or window seats in front half of aircraft
Premium Choice: Choose XL seats (rows 1, 12, 13) for extra legroom
Pro Tip: Seats closer to front board first and deplane faster
⚠️ Common Problem: "Payment failed during seat selection"
Causes: Payment gateway timeout, insufficient funds, card issues
Solutions: Try different payment method, use UPI instead of card, skip seat selection and select later via "Manage Booking", or select seats at airport counter
Add Baggage (If Required)
Add checked baggage if not included in your fare
🎒 IndiGo Baggage Addition Process
What You'll See: A baggage selection page with weight options and pricing
Available Options:
• 15kg - ₹1,700-₹2,500 (most common choice)
• 20kg - ₹2,200-₹3,200 (better value for longer trips)
• 25kg - ₹2,700-₹3,900 (family trips)
• 30kg - ₹3,200-₹4,500 (maximum weight)
Note: Prices vary by route and season
💡 Baggage Addition Tips
Check Your Fare: Some fares include 15kg baggage already
Add During Booking: Cheaper to add baggage during initial booking than later
Web vs Airport: Adding online is cheaper than at airport counter
Skip If Cabin Only: If traveling with just cabin baggage (7kg), skip this step
Payment: Accepts credit/debit cards, UPI, net banking
Generate Boarding Pass
Complete the checkin process and download/email your boarding pass
🎫 Boarding Pass Generation Options
What You'll See: Final checkin confirmation page with boarding pass options
Download Options:
• "Download PDF" - Saves boarding pass to your device
• "Email Boarding Pass" - Sends to your registered email
• "SMS Boarding Pass" - Sends link to your mobile number
• "Add to Wallet" - Saves to Apple Wallet/Google Pay
📱 Boarding Pass Best Practices
Save Multiple Copies: Download PDF + save to phone wallet
Screenshot Backup: Take screenshot of boarding pass as backup
Check Details: Verify passenger name, flight number, date, gate, seat
Print Option: Print at home if preferred (especially for international flights)
QR Code: Ensure QR code is clear and scannable for DigiYatra
✅ Success! Your IndiGo Checkin is Complete
Next Steps:
1. Save boarding pass to phone and take backup
2. Arrive 2 hours early for domestic flights (3 hours for international)
3. Carry valid ID matching booking name
4. Use DigiYatra for faster airport entry (if available)
5. Proceed directly to security if no checked baggage
Most Common IndiGo Checkin Problems & Solutions
Problem 1: "Web checkin not available for this booking"
Causes: Special assistance required, unaccompanied minor, booking too recent, international flight restrictions
Solutions: Check timing (must be 48hrs-60min window), verify no special services in booking, try mobile app, contact IndiGo customer service
Problem 2: "Seat selection payment failed"
Causes: Payment gateway issues, insufficient funds, card problems
Solutions: Try different payment method, skip seat selection, select at airport counter, use "Manage Booking" later
Problem 3: "Cannot generate boarding pass"
Causes: Browser issues, incomplete checkin, system errors
Solutions: Clear browser cache, try incognito mode, use mobile app, try different device
Problem 4: "DigiYatra not working without boarding pass"
Causes: Need boarding pass for DigiYatra entry
Solutions: Complete web checkin first, save boarding pass to phone, ensure QR code is clear
IndiGo Mobile App Checkin
📱 IndiGo Mobile App Advantages
Download: "IndiGo" app from Android Play Store or iOS App Store
App Rating: 4.2/5 stars with 10M+ downloads
Key Benefits:
• Faster checkin process (saved payment methods)
• Push notifications for flight updates
• Offline access to boarding passes
• One-tap rebooking during disruptions
• Saved passenger profiles for frequent travelers
📲 Mobile App Checkin Process
Step 1: Open IndiGo app and login (create account if first time)
Step 2: Tap "My Bookings" or "Check-in" from home screen
Step 3: Select your upcoming flight from the list
Step 4: Follow same checkin flow as web (passenger selection, seats, baggage)
Step 5: Save boarding pass to phone's wallet app
Pro Tip: App remembers your preferences for faster future checkins
🔄 App vs Web Checkin Comparison
Mobile App Wins: Faster, offline boarding pass, push notifications, better for frequent flyers
Web Browser Wins: No download required, larger screen, easier typing, works on any device
Recommendation: Use app if you fly IndiGo regularly, use web for occasional travel
IndiGo Seat Selection Guide
💺 Understanding IndiGo's Seat Selection
When to Select: During booking, web checkin, or via "Manage Booking"
Cost: ₹200-₹1,500 depending on seat location and type
Free Options: Some middle seats may be available for free
XL Seats: Rows 1, 12, 13 offer extra legroom for ₹800-₹1,500
💰 Seat Selection Strategy
Budget: Skip selection - get assigned at airport (usually middle seats)
Comfort: Choose aisle/window in front rows for early boarding
Groups: Select together during booking to ensure adjacent seats
Families: Consider XL seats for families with children
IndiGo International Flights
🌍 International Checkin Differences
Checkin Time: 24-48 hours before (varies by destination)
Documents: Valid passport + visa (if required) mandatory
Baggage: Different allowances for international routes
APIS: Advanced Passenger Information required for some countries
📋 International Checkin Steps
Step 1: Complete web checkin as usual
Step 2: Verify passport details match exactly
Step 3: Add visa information if prompted
Step 4: Arrive 3 hours early at airport
Step 5: Complete immigration and security
IndiGo Customer Support
📞 Need Help? Contact IndiGo
Phone: 0124-6173838
WhatsApp: +91 7065145858
Email: customer.relations@goindigo.in
Social: @IndiGo6E (Twitter), @IndiGo6E (Facebook)